Horn Upgrade How-To
by Derrick Hampson
While looking inside Checker Auto Parts, I saw some upgradable horns, which took me to Wolo's Site.
I was thinking about upgrading to a large semi/train air horn, but did not want to pay the money. Instead I chose the Big Bad Max.
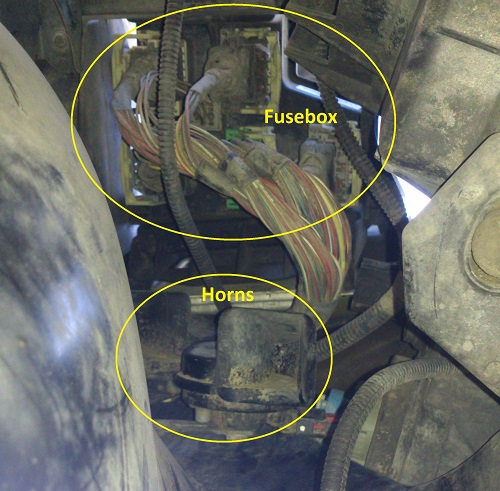
The first step was to find a location in which to install. There are quite a few places a horn can be installed, I chose the location below the original stock two horns. This is located directly below the fuse box in front of the drivers side front tire.
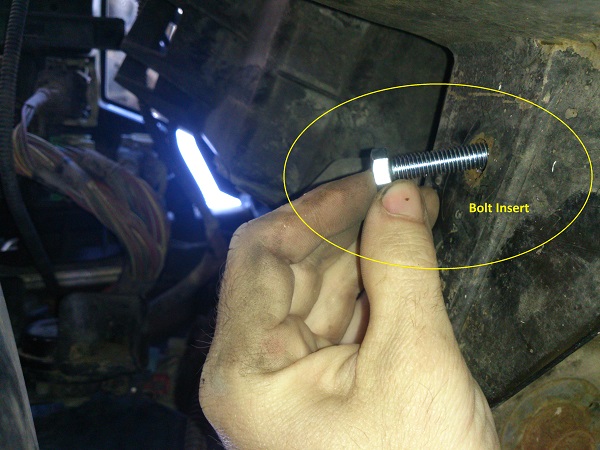
There was already a small indent, so I used my DeWalt drill with a metal bit to create a hole for the hanging bolt to go through.

Insert the bolt and verify you have enough room by hanging the horn.
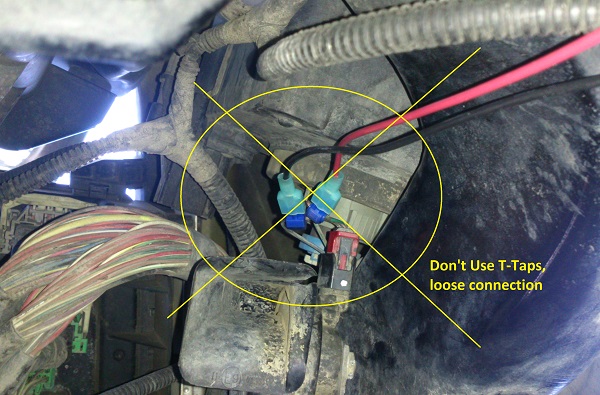
Now onto the wiring. Originally I tested some T-Taps but found out they didn't provide a very solid connection in which soldering provides.
The manufacturer recommended at least a 16-gauge wire, which was found at Checker/O'Reilly auto parts. I also picked up some corrugated tube to protect the wires after install. I decided to solder the Red/Hot wire into one of the horn wires. This was best accomplished by moving the fuse box out of the way for easier access. The black/negative/ground wire I wrapped around the main grounding bolt.
 (need to take picture)
The horn came with a relay I could have wired to an additional switch (most commonly for motorcycles), since I wired it directly into another horn wire, this relay was not needed and I was able to keep the other two hooked up. Soldering provided me with a solid connection for both wires. For the connection to the horn itself, I used some wire connectors, which I ripped off the protective covering after clamping down the connection, and soldered them too. Hey, I may as well, since I had all the tools out!
 (need to take picture)
After doing one final test to verify the horn properly works, it was time to cover the wires with the tubing (I ran extra line and wrapped it around a bar just in case I wanted to move or do work to it in the future), spot wrap sections with electrical tape, and bolted the horn on. I now have the ability to scare zoned-out drivers by the blasting of my horn! I've only been able to do this once since the install, but it was well worth it.
It took about an hour to gather all the tools, inspect locations, and to figure out where to mount. Then I had to add an additional hour for removing the T-Taps and coming up with a new plan for a better connection. Do yourself a favor and just plan on soldering from the beginning, it will save you a lot of time!
Be sure to check out the Photo Gallery as well. I will be splicing a video soon so you will be able to hear the results.